CAGD230: Game Scene
Week 1
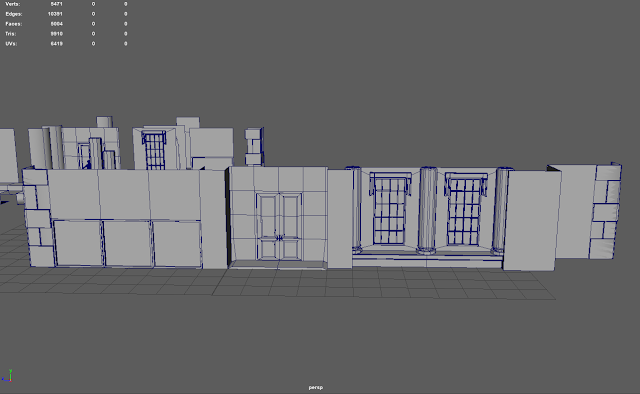
Progress Report: Another project has been assigned and this time we are grouped up and to construct a building from a video game. Our group chose Bioshock Infinite as our inspiring game. And I have taken the challenge of modeling the Montgomery Residence.
It's truly a beast, especially with our limit in polycount, a limit of 5000 tris. Well for this project we need to work with modular modeling so, at the very least, it will be like making Lego pieces and click the pieces together into the final product.
 For this week, we need to start off by blocking our scene. Easy polys to map out what we will need to model. Though for me I somewhat have to start modeling so I can tell the pieces apart by sight and not the outliner. Because, for a building like this, your outliner can fill up pretty easily just in the first week and with the basic foundation. The outliner for mine is almost halfway filled with groups and just basic blocking pieces. I'm a bit terrified to see how much I'll need to duplicate and build for the final building. The part that's the most tricky seems to be the additional balcony for the second floor of the building. It's a bit confusing how to modular model it out. Such as whether or not I should modulate the entire floor or should it just be pieces that match the length of the windows or door. But that would take a lot of pieces and it seems easier to make the entire floor. In the end, I compromised and split it by the railing intersections (the columns) and make it fairly larger than the window or door pieces.


The door piece is pretty big, but 3 meters was still a bit short for the human figure model and I didn't want to go into decimals and I shrugged and went up to 4 meters in height. Well, the Montgomery Residence is supposed to be a manor of sort right? So it would make sense if the entrance door is pretty big. At least that the reason I hold for why the pieces are kinda big. I can't help it. Next week, we'll go more into modeling and start UV-ing (hopefully).
Poly Count for Week 1:


