Thursday, October 8, 2020

Parasitic Sprint 3 Blog Post

Parasitic Level Design Post#3

For our third sprint, I focused on finishing the one big card from Sprint 2 about populating my level with assets and the two Sprint 3 cards I was assigned to, and those cards are: 
  • "As a level designer, I need to create clear boundaries for the player to restrict going off path."
  • "As a level designer, I need to set up the lighting of the level so the atmosphere of the level matches the theme."
This sprint was really about further "fleshing out the level" and waiting for enemies and other assets to be done so we could add them to our level. The first card of this sprint and technically, the card I was already working on since the last sprint was "As a level designer, I need to populate my level with current assets to get the tone of the level established." I worked on this card and the "As a level designer, I need to create clear boundaries for the player to restrict going off path" card at the same time because they coincided. I needed a terrain to visually layout the story and pathing of the level and I needed assets to get a feel of where the terrain elevates and comes in and out of the level. My first version was okay but from the feedback I got, the level would look much better with more color and shading, some height added to the level so that the level isn't completely flat, and assets spread out into the terrain and not just the area where the player moves in. 

Version 1

I did not really have any problems with adding assets in the level itself and populating the level. Adding height to the level itself was sort of a problem, however. Because the terrain would be decimated in blender so it would be low-poly, adding height within the level area (blue grid) would cause the terrain/ground to be uneven. There was a height difference, meaning some areas of the level were higher than others and this was sort of noticeable in-game because in those areas the map's grid would go into the terrain and come out. This would have been okay if it was at least around the small elevation pieces added into the area but it was in large portions of the level. While the elevation isn't tall, at most it's a 0 to 0.2 difference on the y-axis, the player movement does not detect elevation so it would be weird to see the player's feet go into the terrain as they move into some areas of the map. 

Terrain not flat, some areas slightly goes above the map grid 

The solution I had for this problem was done in two parts. First, in blender, I used a very low ratio of the decimate tool so the poly level was flattened as much as possible, and then I resculpted the terrain using blender's modeling tools to flatten it further by smoothening the vertices, this also meant the height added into the level would be shortened considerably. The picture below shows that the mounds with the mountains are much smaller and shorter.

Solution in blender

Then finally, in Unity, I moved the terrain down by -0.08 on the y-axis so most of the elevation would be below the map grid and I used the assets to hide the grid lines that go into any uneven terrain. This meant shifting a lot of assets around and adding more unmovable tiles into my level. Regardless since the camera is from a slight top-down perspective the slight de-elevation of the terrain from the map grid might not even be too noticeable. In the end, I feel like my level is a lot more natural with the height added and a rework of the level's assets. I'm proud of what it came to be and it feels like my hard work paid off. 

Most current version

With this, both the "As a level designer, I need to populate my level with current assets to get the tone of the level established." card and the "As a level designer, I need to create clear boundaries for the player to restrict going off path" card are verified and completed. My remaining cards are "As a level designer, I need to set up the lighting of the level so the atmosphere of the level matches the theme." and "As a level designer, I need to playtest my level to check for discrepancies so the level flows smoothly." I'm currently in-progress with the card about lighting and the latter card is more of a continuous card that goes beyond just 1 sprint. So overall, I feel like I got a lot done this sprint. And now that all our levels are moved into the main Unity project, we'll be able to add assets as they are added into the project and keep up with the rest of the team. I can't wait to fully furnish my level with enemies and player characters so that the level is playable and has clear objectives. Until the next one, cheers!


Wednesday, September 23, 2020

Parasitic Sprint 2 Blog Post

Parasitic Level Design Post#2

The second sprint was focused on transitioning from conception to proofing, meaning we would be moving from designing to implementation. The cards assigned to me this sprint are: 

  • "As a level designer, I need to make an asset list full of possible assets needed to fill my level with purpose and theme for the shrubbery-filled meadow level."
  • "As a level designer, I need to annotate an open-spaced basic introductory level that puts my newly found skills to work in a stress free environment." 
  • "As a level designer, I need to block out an open-spaced basic introductory level that puts my newly found skills to work in a stress free environment"
  • "As a level designer, I need to populate my level with current assets to get the tone of the level established."
There was also the "As a level designer, I need to create a testing ground where we can test the most up to date mechanics" from Sprint 1 that was assigned but wasn't moved. Luckily, we finished it pretty early on for this sprint since this card just entails the Unity collab we would need to set up to implement and test our levels with.

The first Sprint 2 card I work on was the asset list card. I decided to do this first so I would know what assets I'll need in my level. This would also help me annotate my level's map since I'd know what all the core assets would be. There weren't any problems with this card, but there was a bit of feedback about one asset, which is the elevation/terrain asset; instead of requesting this as an asset, it would be better to use the terrain editor in Unity to make elevation instead. 

The next card I worked on was the annotated map. We had been working on several versions of a map for our levels since the last sprint so for this sprint, it was time to fully polish up an annotated map and use it as a building guide for when blocking out our levels. I did encounter some problems with this card, mostly due to the size of the map in that it might be too big and how the level should play out.


The problem with this map was that it was still too large and that there shouldn't be multiple exits. After taking this into consideration, I went back into Photoshop to resize the grid and repaint the paths. 


This is the final approved version of my map. And the next step would be blocking it out in Unity.

Blocking took a while and this is because of 1) the size of my map and 2) I would need to check off the unmovable spaces individually. I had to go at a slower pace to avoid eye strain since I would need constantly to zoom in and out while also looking back and forth between the Unity scene and annotated map. 


After this was done, I could move on to actually blocking out the scene. And similarly, it took a while too since this wasn't just a choice between green and red dots but adding in different primitives as a way to keep track of what would be a tree and what was a rock. Luckily, I only needed to add six different kinds: cylinders for trees, squares for rocks, squashed cylinders for crates and barrels, spheres for buff spots, tilted squares for treasure, and of course, a capsule for the player. 


Midway through this card, there was still time left in the sprint so we were also assigned the asset implementation card. However, I didn't get to finish this card before Sprint 2 ended so this is the card I have in progress for now and for the beginning of Sprint 3. I have the level mostly populated, the only thing left is terrain building and pathing. 


For Sprint 3, I'll be finishing up the terrain and finally playtesting the level. I'm pretty satisified with the current state of my level and can't wait to see how everyone else's levels turn out. Cheers!


Tuesday, September 1, 2020

Parasitic Sprint 1 Blog Post

Parasitic Level Design Post#1

The first sprints are usually, always focused on building the foundations of the game. As a level designer that would mean research, concept-ing, and collaborating with the team. The cards assigned to me or rather our fraction of level designers are: 

  • "As a member of Parasitic Studios, I need a Unity account" 
  • "As a level designer, I need to create a testing ground where we can test the most up to date mechanics" 
  • "As a level designer, I need to research and annotate grid-based levels similar to that of XCOM 2" 


The cards that are completed are "As a member of Parasitic Studios, I need a Unity account" and "As a level designer, I need to research and annotate grid-based levels similar to that of XCOM 2". The first being the easiest since a Unity account is required in most CAGD classes. The next one was heavily concept-ing and researched. Collaboration was also a big part of this card as our level designers discussed and shared examples and guides of what strategy levels should feel like, how the grid-based levels would look like, and why certain concept levels work and others do not.


The one card that is still "In Progress" is the "As a level designer, I need to create a testing ground where we can test the most up to date mechanics". This card relied on components from other cards such as a collaborative Unity file where we could set up a testing ground and the grid-based systems and other scripts that our programmers were working on. Thus for this sprint, we focused more on concept-ing and making concept, grid maps of our level. 


Problems Encountered: 

There weren't any big problems aside from being blocked from working on the testing grounds. Problems in this sprint were mainly from developing my level's concept map. My first map was obviously a bit small and very linear. It was a basic block out of the level's terrain and it didn't include any of the enemies or any clear indication where the player would start. 


So to fix these issues my next map was more colorized and larger. This concept piece showed a larger level with more terrain and the enemies/player placements. However, the problem with this level is that it's not a grid, the shapes are hexagons and not squares. The level itself is still too linear and for a level that should that 20 minutes or so to complete this concept still falls short. 


The third concept map I made used pixels instead of hexagons. It's also considerably longer and larger. There are many more enemies and it's definitely less linear. The level starts on one path but splits into three different routes before leading the player into a larger field for a all-out brawl. But the downside of this level is that it's too large and there are way too many enemies, especially that last area which would overwhelm the player too much. Another concern was the fact that the design document described the first level as an open meadow and my map was more like a closed forest. 


My most recent map and final one of this sprint is designed to be more open and meadow-like. The path (yellow-ish) tiles show the player the intended routes but the openness of the level encourages exploration. There are fewer enemies and the length of the level looks good enough to last 20 or so minutes. The only problem with this level would be that it's not fleshed out enough and rather messy. I hope to fully realize this level when we get our testing ground set up and start building the level in Unity so I can test the level for accuracy of length and challenge. 


Monday, August 24, 2020

SciFi Hallway

CAGD373 Scifi Hallway


For this assignment, we needed to model, texture, and set up a scene in Unity of a modular SciFi hallway. Some of the requirements included needing to model certain types of modules in Maya, making emissive textures in Substance Painter, and creating particle effects in Unity. 

Problems Encountered

Unfortunately, I encountered several problems during this assignment. Reasons why range from "shaking off the rust from not using these programs in a while" and "busy with work from other classes" to "the newer versions of the program throwing me off guard" and "I'm just dumb". 

Ngons and translating to Substance Painter

Problem: One of the earliest problems I had was ngons in my model. Somehow I had forgotten to check for them before exporting my FBX and going into Substance Painter. This made texturing a bit difficult because they didn't import or bake properly. I also have forgotten how to separate baking IDs from normals and just the plain lowpoly export. This resulted in me having 10+ maps in Substance Painter when we were only supposed to have 2. 

Solution: As a result, I went back to Maya and cleaned up my models as well as re-UVing most of the assets. I also duplicated the modular pieces several times to separate the high poly, low poly, and ID exports. 


Materials not translating well to Unity

Problem: Another problem I had was some of my materials and textures didn't translate well into Unity. At first, I found that the problem was my metallic was not turn up; then it was not labeling my normal maps; my window had transparency but making the material transparent caused everything else to have transparency too, and finally, the emissive were transparent for some reason. 

Solution: Most of these problems I fixed by messing with the material in the inspector or changing the png/map's import settings. The window one I fixed by creating a third transparency material specifically for one element on my window objects. But some problems still lingered. For example, the emissive maps were fully transparent but I changed the color to white and the emissive gained more of its texture and color but it still had some transparency. 


Unity HDRP being different

Problem: This is more of a "me learning the new version" problem in that this version of Unity's HDRP is different from what I was used to. They use visual graphs now and making particle systems was completely different. Unfortunately, I didn't have time to learn the new VFX graph for shaders and materials. I thought I could outsmart the system by making my particles in a normal Unity project and exporting them to the HDRP but to my dismay, the materials and renders had errors and turned up to be pink squares. Also, the HDRP does not support the usual post-processing packages so I had to learn to use the new built-in post-processing. 

Solution: The solution I had for the particle system was to resort to using default particles and rolling it with. I didn't know how to properly add pngs and textures to the new particle/unlit material because it lacked the input for it and you had to add maps now instead. As for the post-processing, it seems like Unity made it easier to navigate and use, so I was pretty happy that I could easily learn it and adapt to it. I'm happy with how the HDRI turned out too despite it being a bit more brighter than expected. 


I'm still learning the new versions of each program and still brushing off the rust on handling the standard mechanics and technicals of it all. I can't say I'm 100% satisfied with how things turn out especially when I had to go back and redo most of the things and recreate Maya MA, SPP, and Unity project files. But I think that everything turned out better than I expected. I hope to do even better next time and be 200% proud of my work. Cheers.


377 Mobile Development - Blog Post 1

Team Titan Sprint 1 - 4

Our development in the mobile game Titanic Arena has now reached near the end of Sprint 3. Titanic Arena is an action strategy game that requires the player to moving their characters around to auto-attack but they also have to avoid getting hit by enemies in an obstacle-filled arena. The player faces off waves of enemies and a Titan boss at the end of each wave. 

Team Titans is a small team composed of the lead producer, the main programmer, and our level designer. We used the skills and experience we gained in 370 Video Game Development to work around a Trello Board, collaborate in Unity's Collab, and follow the Agile Development process throughout our development pipeline. However, since this is a mobile game there are some differences from our time in 370. The major change being building for mobile, specifically an Android APK. This meant we had to research how to program and implement touch-input/mobile controls. We would also need to playtest this on a mobile phone which takes a few more steps than just pressing play in Unity itself. This results in a rather rough start into development but after a couple of sprints, especially Sprint 3 we have found our bearings and will be more effective moving forward. 

Cards assigned to me

A Closer Look at Each Sprint: 

Sprint 1

Cards Assigned to Me: 4 
  1. As a Player, I would like to have assets available to play the game's paper prototype
  2. As a Developer, I'd like to get a head start on what we'll need for Sprint 2
  3. As a Team, we would like a collaborative space (on Unity) where we can work on the electronic build together
  4. As a Player, I would like a rule sheet to know how to initiate and play the game
Completed Cards: 4

Sprint 1 was all about developing our physical prototype to prove our concept and feature. For this sprint, my main tasks were to help develop the rule sheet, compile the physical prototype together, and build our backlog. We also started our Unity Collab for this sprint to make sure we'll get a head start on the next sprint. 

Sprint 1 Completed Cards

Sprint 2

Cards Assigned to Me: 4 
  1. As a Player, I would like to battle against waves of enemies 
  2. As a Player, I would like the main menu shown at the start of the game and to go back to from time to time
  3. As a developer, I want the player to be able to battle against a variety of enemies 
  4. As a team, we should research how to implement the APK and mobile features into our game
Completed Cards: 2
  1. As a Player, I would like to battle against waves of enemies 
  2. As a Player, I would like the main menu shown at the start of the game and to go back to from time to time
Incompleted Cards: 2
  1. As a developer, I want the player to be able to battle against a variety of enemies 
  2. As a team, we should research how to implement the APK and mobile features into our game
In Sprint 2, we started adding the basic essential features in our Unity project. My tasks overall are to help make things other than the level and work on certain scripts that use the main scripts that Adam worked on. Specifically, I worked on a wave spawner script and game object and the main menu that shows up at the start of the game and leads the player to the level. I also worked with Adam to create various types of enemies that would show up in the waves and as a team, we needed to research building an APK and mobile controls. These two tasks however were not finished in this sprint. 

Sprint 2 Completed Cards

Sprint 3

Cards Assigned to Me: 8
  1. As a team, we should have an APK electronic prototype ready before the playtest
  2. As a team, we need to playtest our game before the APK playtest to make sure our game works as intended
  3. As a designer, I need a button in the main menu that leads the player to the game
  4. As a Player, I would like to be able to dodge attacks
  5. As a designer, I need to test whether the base controls work on mobile
  6. As a player, I want a pause menu that can freeze the game and/or move me to the main menu
  7. As a player, I need options in the pause menu that can move me to the main menu, restart the level, and quit the game.
  8. As a player, I would like basic upgrades that increase my health and speed
Completed Cards: 7
  1. As a developer, I want the player to be able to battle against a variety of enemies (Sprint 2)
  2. As a team, we should research how to implement the APK and mobile features into our game (Sprint 2)
  3. As a team, we should have an APK electronic prototype ready before the playtest
  4. As a team, we need to playtest our game before the APK playtest to make sure our game works as intended
  5. As a designer, I need a button in the main menu that leads the player to the game
  6. As a Player, I would like to be able to dodge attacks
  7. As a designer, I need to test whether the base controls work on mobile
  8. As a player, I want a pause menu that can freeze the game and/or move me to the main menu
  9. As a player, I need options in the pause menu that can move me to the main menu, restart the level, and quit the game.
The recent sprint we finished is our third one. The main goal for this sprint was to have a working electronic APK build ready for the first electronic playtest. We completed all our lingering cards from Sprint 2 within the first week and met our goal of having a working APK ready just in time for the playtest. My main tasks for this sprint was largely playtesting and revising scripts as well as finishing cards from the previous sprint. 

Sprint 3 Completed Cards

Sprint 4

Cards Assigned to Me: 8
  1. As a Player, I would like to earn gold for weapons and upgrades for each kill
  2. As a team, we want the APK to be ready by the playtest
  3. As a player, I want the controls and games to work seamlessly on mobile and emulator
  4. As a player, I would like the controls to be bigger on-screen so I can use them
  5. As a Player, I would like to have a shop to spend gold on weapons and upgrades.
  6. As a designer, I need a menu that leads the player to the shop
  7. As a designer, I need a button from the shop that the player can tap on that leads them back to the main menu
  8. As a player, I want the game modes to be improved and balanced based on feedback
Card in progress: 1
  1. As a player, I would like basic upgrades that increase my health and speed
The current sprint we are on is our fourth one. For this sprint, I will be working on the shop/upgrade feature as well as improving the game based on the feedback we received from the previous playtest. 

Total Card Count (as of now):

Cards Assigned to Me: 24
Completed Cards: 15
Cards in Progress: 9

Issues/Problems Encountered 

Problem #1: No Android phone to use for testing 
One of the issues we had to deal with at the end of Sprint 2 and at the beginning of Sprint 3 was the lack of an Android device to test on. The only group member that has an Android phone is our level designer, Austin. However, his phone model was older and the lack of a USB cable meant that he couldn't use his phone to test the mobile controls. 

Solution #1: Using iOS instead
The solution I came up with for this problem is to export the Unity project and move it to a new blank project with iOS build settings. This way I could use my iPhone to test the mobile controls. The mobile touch controls worked the same way for both phones and Unity made it easy for UI elements since buttons automatically recognize touch-inputs. 


Problem #2: Building and Testing APK 
Another issue that was quite damning was building and testing an APK. This is a new thing for all of us and we had a lot of different research on how to properly build an APK. However, the bigger problem was testing the APK build. I could test mobile controls on an iPhone but testing whether or not an APK works is a whole different story. This resulted in a need for an emulator. The first one I tried was the Andyroid emulator. However, nothing worked when I dragged the APK to the emulator and the emulator itself was a clone of the usual Android phone thus there weren't any clear options to add an APK into the program.

Solution #2: Android Studios and Bluestacks 
The next step was to try out Android's debugging and testing tools for APKs in their Android Studio program. This was a very complicated program to use. It takes up a lot of data storage as well which resulted in me needing to redownload the program on another computer because the current one I'm using already had large programs like Unity, Maya, Substance Painter, and Substance Designer. Android's virtual device emulator takes a lengthy amount of time to load and it lags a lot. It takes several tries and restarts of the program to actually install the APK. Later, I tried the Bluestacks emulator and found it to be really effective in testing APKs. Unlike Andy, Bluestacks shows the APK being downloaded and actually installs the APK file when you drag it to the emulator. 

Using Android Studios to test HelloWorld APK

Monday, December 16, 2019

Making Bioshock Infinite's Montgomery Residence Part 5

CAGD230: Game Scene

Final Model

Report: Now that the modular pieces are done. I need to build my building and mesh-combine to export it to Unity. I did a test build previously but it turns out when I added the backside, the tri-count went over.   

Example Build
Sike it's only 1/2 of it

Thus I had to adjust and remove a couple of walls, trimmings, and just decrease the size of it in general. But the final build looks similar so I think it wasn't much of a problem.


Some of the textures look very... plastic, unfortunately. Though they are supposed to be white walls/materials so I'm not sure what to do to make it less... doll-house. The lighting in Maya is a bit poor too or I'm not sure how to add properly lights and what settings they should be. Comparatively, Unity's auto-generated lighting is very nice.

Here are some renders from both Maya and Unity:

Maya Renders

Unity Renders

I'm glad to say that this project is done! 3D modeling can actually be fun when you get into the flow of it. Of course it's frustrating when you realize modeling mistakes when you're in the UV/Texturing phase and when the program crashes (and you didn't save for the past 3-4 hours). But it's nice to see how your model turns out overall.


Thursday, December 12, 2019

Making Bioshock Infinite's Montgomery Residence Part 4

CAGD230: Game Scene

Week 5

Progress Report: We're in the final stretch now and all I can say for this week is: texturing/UV-ing done! All that's left is to import into Unity as a group and set up our scenes. Hopefully, my group is at least 90% done with their own buildings so we can finish the project by this weekend. Otherwise, this finals week will be pretty hectic. 


We had a limit of two maps to work with. For that, I focused a lot of the minimalistic parts onto the first map. A lot of them are overlapping each other so they can all fit. I think this is fine since a lot of them are the upper floor pieces. The first and second floors had larger pieces which I complied snuggle-ly together. 


Overall, I think they turned out pretty decent. Onto Unity!

Wednesday, December 4, 2019

Making Bioshock Infinite's Montgomery Residence Part 3

CAGD230: Game Scene

Week 3-4

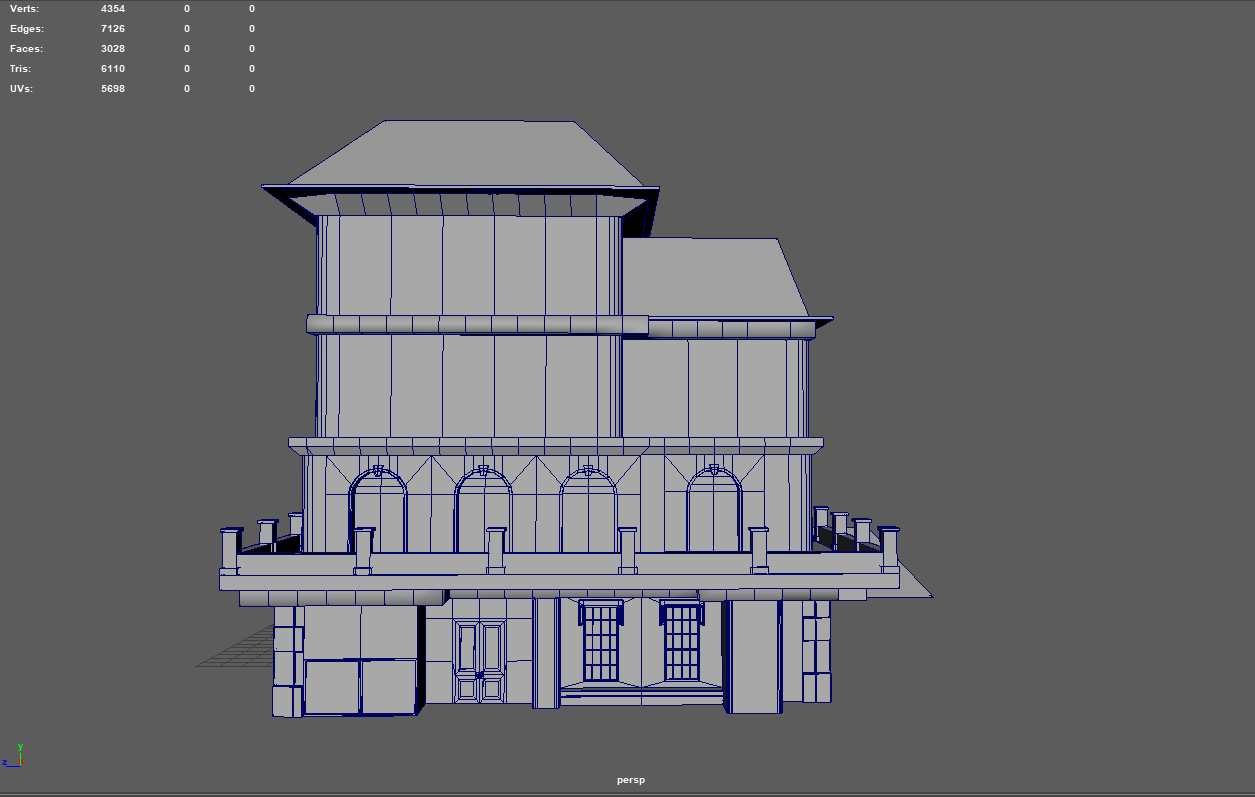
Progress Report: Modeling and testing are done! For the past two weeks, I've been remodeling windows and doors to save tris and poly. So the door problem is fixed! For clarity, in the previous week, I had an issue for the door as it took up too many tris (the 900 horror). Instead of spending productive time looking for an answer and the problem, I just figured it would be easier to remodel the door. And now it's at a blissful 268 tris. 


And here is the full example build: 


Of course, it's not "complete". The build is only the front half which is at 4634 tris. Hopefully, with the basic parts, the back half will be lower than 400 tris so I can make the tri-count. 


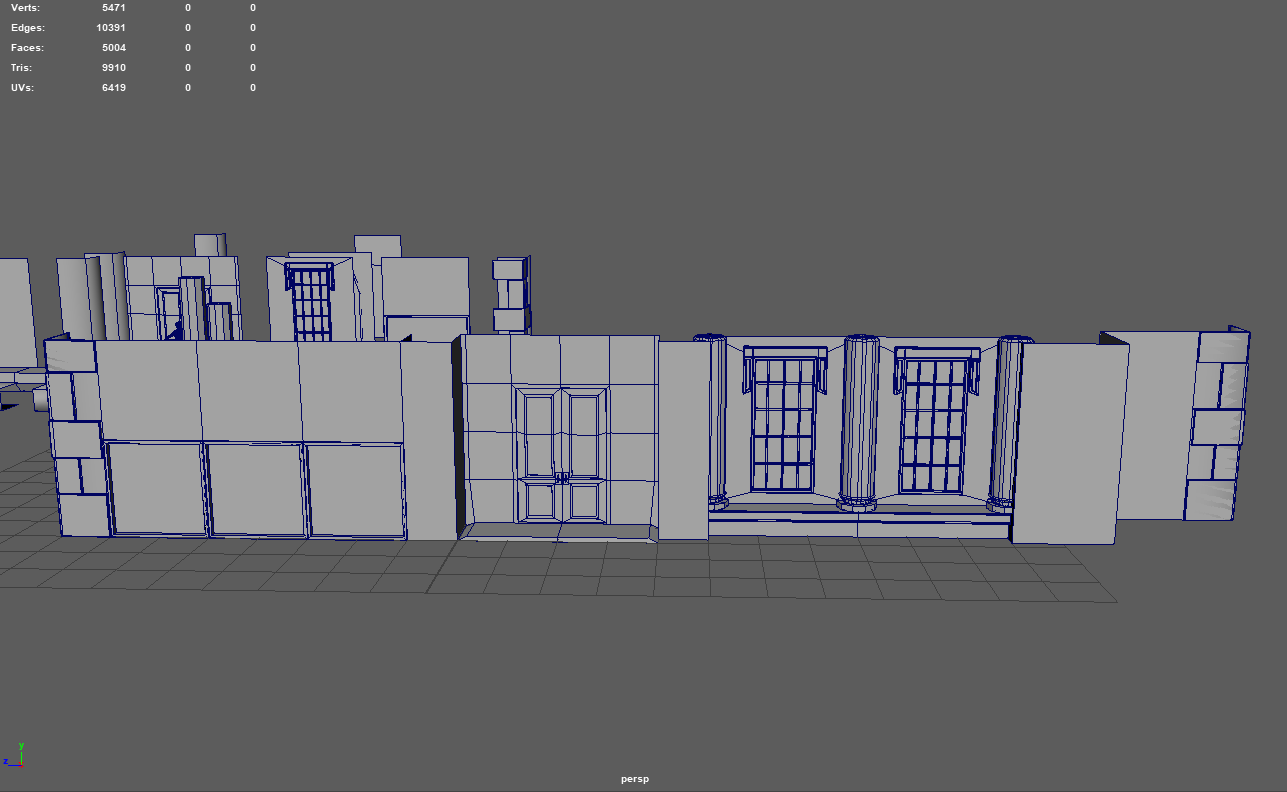
Here are the modular pieces which alone are at a total of 1476 tris. This excludes the balcony and roof cubic pieces as they are too large. 


With 1 or so week left, all that's left is UV, texturing, and importing the pieces to Unity. Hopefully, it doesn't take too much time or space. Wish me godspeed. 

Poly Count for Part 3 (build+modular pieces): 


Wednesday, November 20, 2019

Making Bioshock Infinite's Montgomery Residence Part 2

CAGD230: Game Scene

Week 2

Progress Report: Week 2 is here! And the progress I've made for this week is completing most of the pieces for the first floor! I had to remodel most of the pieces after learning new concepts in class. Mostly using the "snap to grid" feature and learning how to properly extrude and bevel which is really helpful for making more complicated pieces. I'm satisfied that my pieces look nicer now. 


last week
this week

I laid out an example of the first floor and it looks pretty good if I say so myself. Of course, it doesn't come without problems. As you might notice, the poly count is pretty high, over 9000 tris to be exact (haha). 


But this is the total running, including the bipedal human model that takes up about 4000 tris. Of course, I'm still over 5000 tris... It seems that the first floor itself is more than 4000 tris. 


You might ask "what the heck is taking up all the poly count?" Well, it's the door and the corner pieces. The door has a tri-count of 900 alone. The corner pieces have 600 and there's two of them so both would already be 1200+. Other pieces such as the window, pillar, and panel walls only range from 100-300 tris. And yes, I have been deleting the faces that are not seen. Well not all of them, the corner pieces probably have some but it's mainly the beveled part of it. The door is mostly cleaned up, I'm afraid that the count might be coming from me trying to get rid of ngons. Thus resulting in maybe unnecessary cuts such as the sides and in the middle. Honestly, I'm surprised the door has that much tris as it seems a bit simpler than the window. My guess is all the extruding I did along with bevel. I'll have to remodel it to see what went wrong. I guess this weekend will be a long one. 

A 900 tris door next to a 380 tris window
Poly Count for Week 2: 


Wednesday, November 13, 2019

Making Bioshock Infinite's Montgomery Residence Part 1

CAGD230: Game Scene

Week 1

Progress Report: Another project has been assigned and this time we are grouped up and to construct a building from a video game. Our group chose Bioshock Infinite as our inspiring game. And I have taken the challenge of modeling the Montgomery Residence. 


It's truly a beast, especially with our limit in polycount, a limit of 5000 tris. Well for this project we need to work with modular modeling so, at the very least, it will be like making Lego pieces and click the pieces together into the final product. 

For this week, we need to start off by blocking our scene. Easy polys to map out what we will need to model. Though for me I somewhat have to start modeling so I can tell the pieces apart by sight and not the outliner. Because, for a building like this, your outliner can fill up pretty easily just in the first week and with the basic foundation. The outliner for mine is almost halfway filled with groups and just basic blocking pieces. I'm a bit terrified to see how much I'll need to duplicate and build for the final building. The part that's the most tricky seems to be the additional balcony for the second floor of the building. It's a bit confusing how to modular model it out. Such as whether or not I should modulate the entire floor or should it just be pieces that match the length of the windows or door. But that would take a lot of pieces and it seems easier to make the entire floor. In the end, I compromised and split it by the railing intersections (the columns) and make it fairly larger than the window or door pieces. 


The door piece is pretty big, but 3 meters was still a bit short for the human figure model and I didn't want to go into decimals and I shrugged and went up to 4 meters in height. Well, the Montgomery Residence is supposed to be a manor of sort right? So it would make sense if the entrance door is pretty big. At least that the reason I hold for why the pieces are kinda big. I can't help it. Next week, we'll go more into modeling and start UV-ing (hopefully). 

Poly Count for Week 1: