Friday, December 20, 2019
Monday, December 16, 2019
Making Bioshock Infinite's Montgomery Residence Part 5
CAGD230: Game Scene
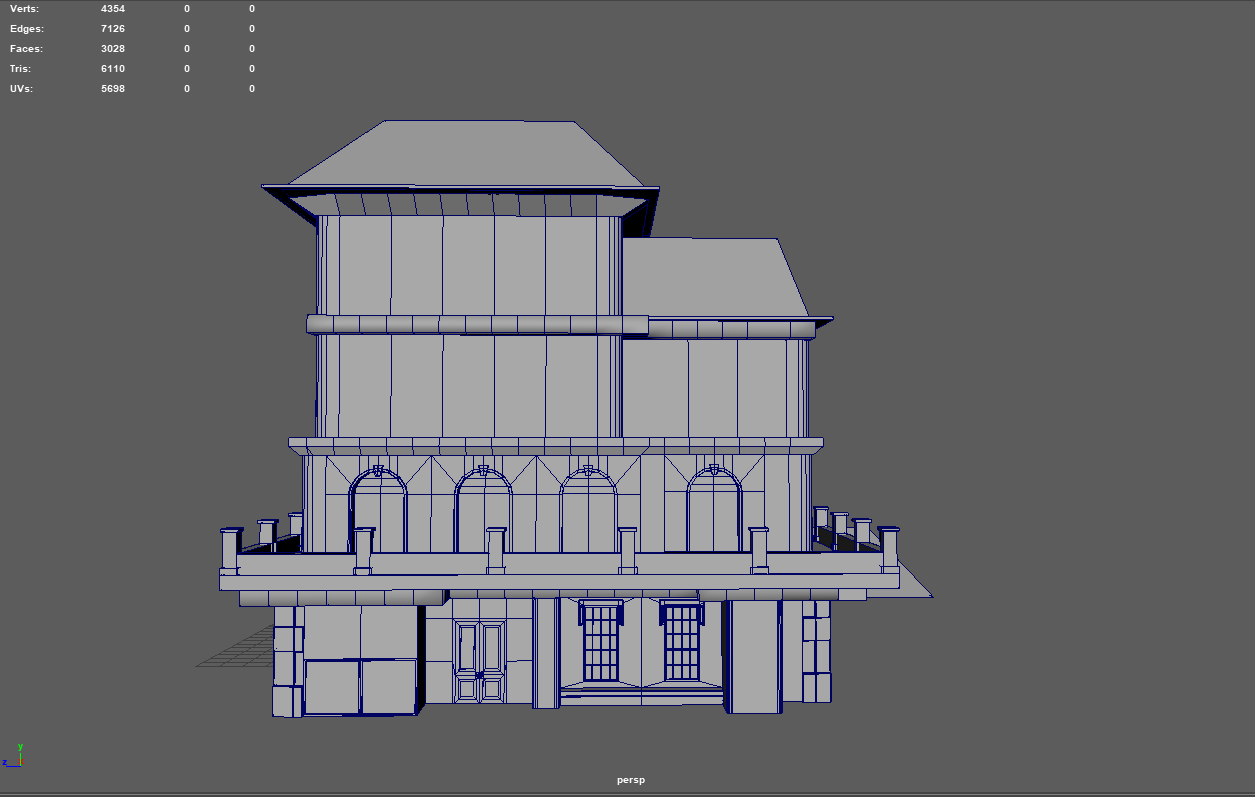
Final Model
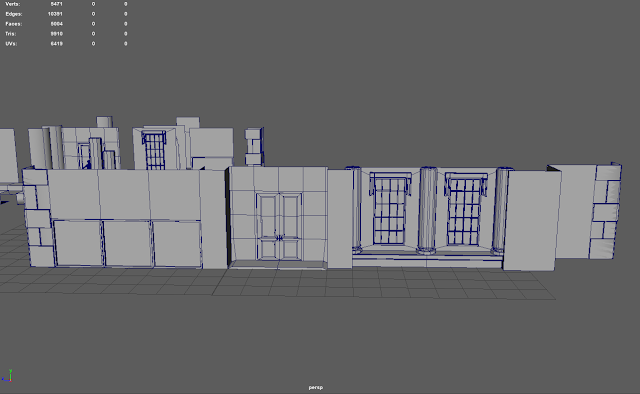
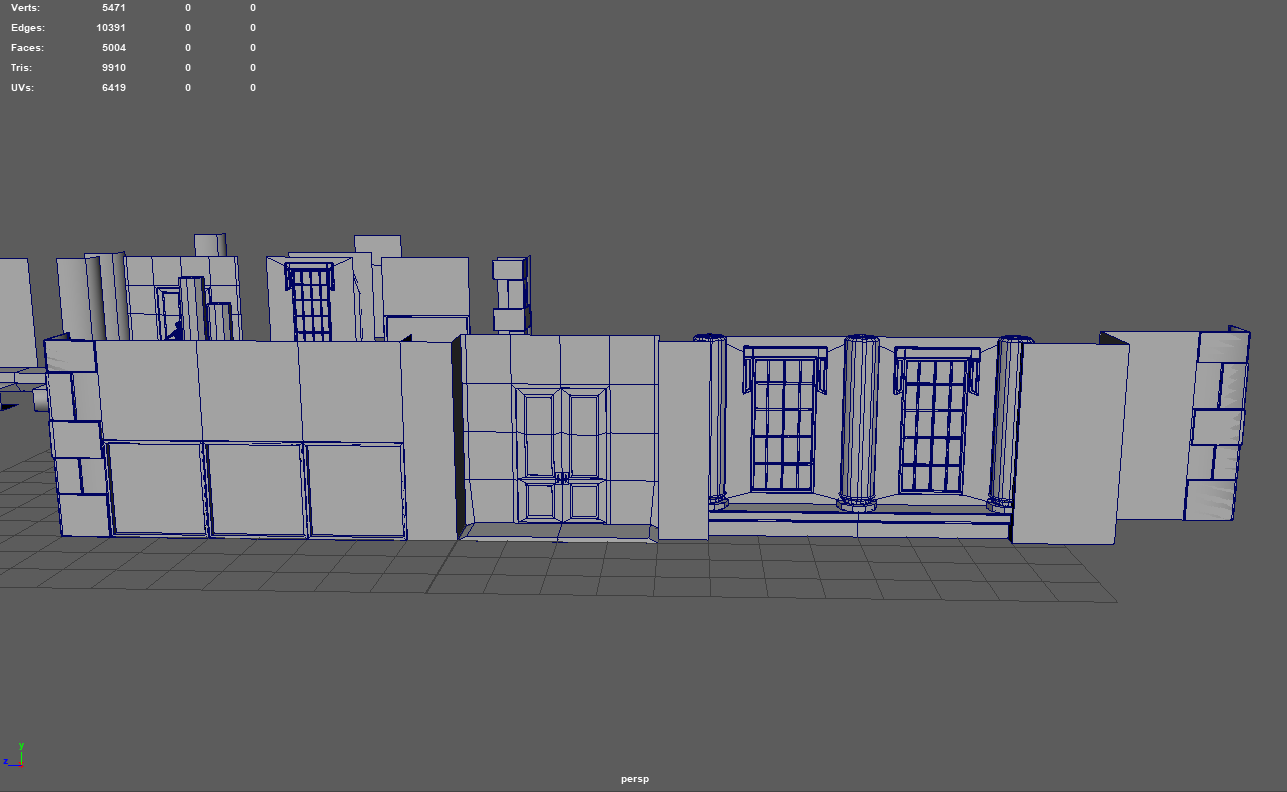
Report: Now that the modular pieces are done. I need to build my building and mesh-combine to export it to Unity. I did a test build previously but it turns out when I added the backside, the tri-count went over.
Thus I had to adjust and remove a couple of walls, trimmings, and just decrease the size of it in general. But the final build looks similar so I think it wasn't much of a problem.

Some of the textures look very... plastic, unfortunately. Though they are supposed to be white walls/materials so I'm not sure what to do to make it less... doll-house. The lighting in Maya is a bit poor too or I'm not sure how to add properly lights and what settings they should be. Comparatively, Unity's auto-generated lighting is very nice.
Here are some renders from both Maya and Unity:


I'm glad to say that this project is done! 3D modeling can actually be fun when you get into the flow of it. Of course it's frustrating when you realize modeling mistakes when you're in the UV/Texturing phase and when the program crashes (and you didn't save for the past 3-4 hours). But it's nice to see how your model turns out overall.
 |
| Example Build |
 |
| Sike it's only 1/2 of it |
Thus I had to adjust and remove a couple of walls, trimmings, and just decrease the size of it in general. But the final build looks similar so I think it wasn't much of a problem.

Some of the textures look very... plastic, unfortunately. Though they are supposed to be white walls/materials so I'm not sure what to do to make it less... doll-house. The lighting in Maya is a bit poor too or I'm not sure how to add properly lights and what settings they should be. Comparatively, Unity's auto-generated lighting is very nice.
Here are some renders from both Maya and Unity:
Maya Renders

Unity Renders

I'm glad to say that this project is done! 3D modeling can actually be fun when you get into the flow of it. Of course it's frustrating when you realize modeling mistakes when you're in the UV/Texturing phase and when the program crashes (and you didn't save for the past 3-4 hours). But it's nice to see how your model turns out overall.
Thursday, December 12, 2019
Making Bioshock Infinite's Montgomery Residence Part 4
CAGD230: Game Scene
Week 5
Progress Report: We're in the final stretch now and all I can say for this week is: texturing/UV-ing done! All that's left is to import into Unity as a group and set up our scenes. Hopefully, my group is at least 90% done with their own buildings so we can finish the project by this weekend. Otherwise, this finals week will be pretty hectic.


We had a limit of two maps to work with. For that, I focused a lot of the minimalistic parts onto the first map. A lot of them are overlapping each other so they can all fit. I think this is fine since a lot of them are the upper floor pieces. The first and second floors had larger pieces which I complied snuggle-ly together.

Overall, I think they turned out pretty decent. Onto Unity!
Wednesday, December 4, 2019
Making Bioshock Infinite's Montgomery Residence Part 3
CAGD230: Game Scene
Week 3-4
Progress Report: Modeling and testing are done! For the past two weeks, I've been remodeling windows and doors to save tris and poly. So the door problem is fixed! For clarity, in the previous week, I had an issue for the door as it took up too many tris (the 900 horror). Instead of spending productive time looking for an answer and the problem, I just figured it would be easier to remodel the door. And now it's at a blissful 268 tris.

And here is the full example build:

Of course, it's not "complete". The build is only the front half which is at 4634 tris. Hopefully, with the basic parts, the back half will be lower than 400 tris so I can make the tri-count.

Here are the modular pieces which alone are at a total of 1476 tris. This excludes the balcony and roof cubic pieces as they are too large.

With 1 or so week left, all that's left is UV, texturing, and importing the pieces to Unity. Hopefully, it doesn't take too much time or space. Wish me godspeed.
Poly Count for Part 3 (build+modular pieces):

Wednesday, November 20, 2019
Making Bioshock Infinite's Montgomery Residence Part 2
CAGD230: Game Scene
Week 2
Progress Report: Week 2 is here! And the progress I've made for this week is completing most of the pieces for the first floor! I had to remodel most of the pieces after learning new concepts in class. Mostly using the "snap to grid" feature and learning how to properly extrude and bevel which is really helpful for making more complicated pieces. I'm satisfied that my pieces look nicer now.


 |
| last week |
 |
| this week |
I laid out an example of the first floor and it looks pretty good if I say so myself. Of course, it doesn't come without problems. As you might notice, the poly count is pretty high, over 9000 tris to be exact (haha).
But this is the total running, including the bipedal human model that takes up about 4000 tris. Of course, I'm still over 5000 tris... It seems that the first floor itself is more than 4000 tris.

You might ask "what the heck is taking up all the poly count?" Well, it's the door and the corner pieces. The door has a tri-count of 900 alone. The corner pieces have 600 and there's two of them so both would already be 1200+. Other pieces such as the window, pillar, and panel walls only range from 100-300 tris. And yes, I have been deleting the faces that are not seen. Well not all of them, the corner pieces probably have some but it's mainly the beveled part of it. The door is mostly cleaned up, I'm afraid that the count might be coming from me trying to get rid of ngons. Thus resulting in maybe unnecessary cuts such as the sides and in the middle. Honestly, I'm surprised the door has that much tris as it seems a bit simpler than the window. My guess is all the extruding I did along with bevel. I'll have to remodel it to see what went wrong. I guess this weekend will be a long one.
 |
| A 900 tris door next to a 380 tris window |
Poly Count for Week 2:

Wednesday, November 13, 2019
Making Bioshock Infinite's Montgomery Residence Part 1
CAGD230: Game Scene
Week 1
Progress Report: Another project has been assigned and this time we are grouped up and to construct a building from a video game. Our group chose Bioshock Infinite as our inspiring game. And I have taken the challenge of modeling the Montgomery Residence.

It's truly a beast, especially with our limit in polycount, a limit of 5000 tris. Well for this project we need to work with modular modeling so, at the very least, it will be like making Lego pieces and click the pieces together into the final product.
 For this week, we need to start off by blocking our scene. Easy polys to map out what we will need to model. Though for me I somewhat have to start modeling so I can tell the pieces apart by sight and not the outliner. Because, for a building like this, your outliner can fill up pretty easily just in the first week and with the basic foundation. The outliner for mine is almost halfway filled with groups and just basic blocking pieces. I'm a bit terrified to see how much I'll need to duplicate and build for the final building. The part that's the most tricky seems to be the additional balcony for the second floor of the building. It's a bit confusing how to modular model it out. Such as whether or not I should modulate the entire floor or should it just be pieces that match the length of the windows or door. But that would take a lot of pieces and it seems easier to make the entire floor. In the end, I compromised and split it by the railing intersections (the columns) and make it fairly larger than the window or door pieces.

The door piece is pretty big, but 3 meters was still a bit short for the human figure model and I didn't want to go into decimals and I shrugged and went up to 4 meters in height. Well, the Montgomery Residence is supposed to be a manor of sort right? So it would make sense if the entrance door is pretty big. At least that the reason I hold for why the pieces are kinda big. I can't help it. Next week, we'll go more into modeling and start UV-ing (hopefully).
Poly Count for Week 1:

Monday, November 4, 2019
Modeling a Living Room Part 5
CAGD230: Living Room
Week 5 Final

Final Report: Now that week 5 is finally here, it's time to finish up this project. I've come to understand the artist's struggle with preferring the rough draft over the final one. I definitely think the scene looks better in the Maya editor than in render. To think the most time-consuming part of it all is the rendering. Not only does it heat up my laptop, but it takes roughly 10 minutes just to render each image. It's annoying because I see a lot of weird bugs in the final images. And trying to fix them takes forever. Yet I still have trouble with it. Searching online for answers is difficult as well because I'm not sure what to search and most of the time the solutions do not work.
Total Approx. Hours Spent: 28 Hours (4-6 hrs a week)

Problems encountered:
- Grainy Ambient Occlusion or Beauty Layer
- Attempts at a solution:
- Increasing Render Sampling: takes too long to render and sometimes makes the image worse.
- Mixing up settings in Lights: no difference or makes image worse
- Masking the AO in Photoshop: somewhat works but the image is still a bit grainy
- TV looks strange at different angles
- Attempts at a solution:
- Changing Mesh Light settings: makes the TV look worse
- Changing TV screen Texture: not much difference
- Using different angles: somewhat works
Moving Forward: It seems that the parts I have the most difficulties with are the Lights and Rendering. Taking this in mind, I will definitely take more time working with these areas. I should also ask for help outside of the internet as it's difficult to find the appropriate type of help online. It might also be best to try and render my images on school computers to see if it's faster because rendering on my own device takes too long.

Wednesday, October 30, 2019
Modeling a Living Room Part 4
CAGD230: Living Room
Week 4 Progress
Progress Report: I still have a couple of UVs left to do such as the wall, floor, and some smaller items. Meanwhile, I have actually started to add lights to my scenes. This way I can actually check how my textures look in the renders. Some textures are using Arnold's aistandardsurface so I had to check whether they look natural in the scene.


There are a couple of issues I'm having with the lights as well or maybe it's also the texturing that needs help. The first one isn't too difficult, it's the lighting in the cabinet I modeled. You can see that the half-circles in the back are the real lights and the orbs in front are, I suspect, the lights reflecting from the glass panel in front of the shelf. I might just need to play with the attributes and the texture of the cabinets itself or remove the glass panel entirely.

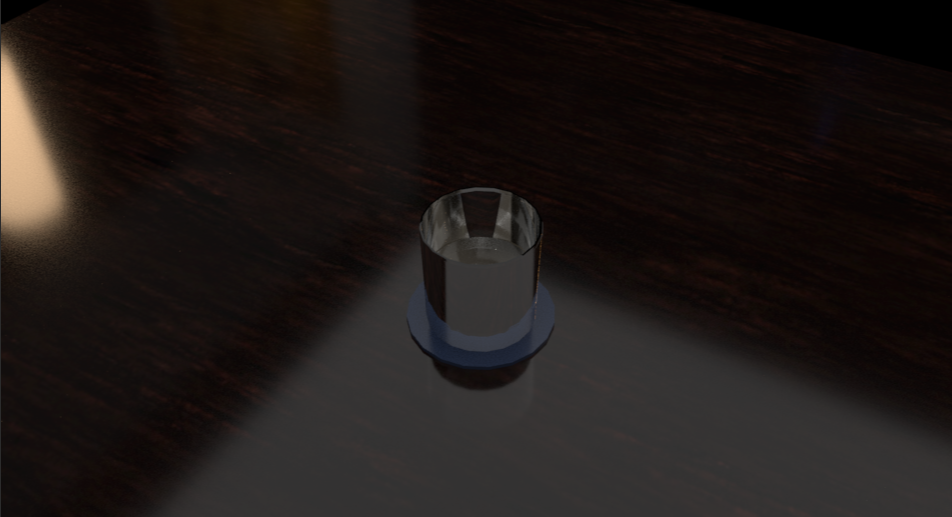
The second issue I have is the lighting on the glass cup. I suspect it's the glass texture itself that might be causing the issue. The issue is that it looks strange, the glass texture that it is. And when you rotate it, it looks different. I have been working on this issue but it's difficult to actually fix it. That's because you can't see the glass texture in actual Maya. You have to render it in order to see the texture and rendering takes a long time, even with a low resolution. Plus a low resolution isn't the best for this as it's difficult to actually see the texture as it would look too grainy.


The last issue I need to fix is the TV. It's not too bad, but there's not enough light casting off the TV. The TV looks bright but for it to be realistic, there should be some sort of cone or ray of light coming out of it. However, the mesh light does not do that and I'm not sure how to do that, I might need to look online for a guide.

There are still lights I have to add to this scene, such as ceiling lights and light coming from the window. I did model this scene with daylight in mind. But that would mean, I probably should remove most of the lights from my scene now. Because it's a waste of energy to use lights during the day... Plus it feels too strange to have both sunlight and light from the lamps. But maybe I might just stick to a more night vibe. Who knows. We'll see how this will end by next week as it will be the last. Stuff that's left to do include: finish texturing and working on lights.

Wednesday, October 23, 2019
Modeling a Living Room Part 3
CAGD230: Living Room
Week 3 Progress
Progress Report: This week's objective is UV-ing and texturizing. So far, I would say I'm about 45-50% done with the UVs and textures. Luckily not everything needs a certain texture. For example, the cabinets and TV tables are okay with the basic aistandardsurface. Of course, I'll change the preset and mess with the attributes a bit. The overall look I'm going for is more of a shiny metallic surface.
 |
| chrome cabinets |
While the UV-ing and texturing itself aren't hard, it does take some time to do. The game disc boxes are a prime example. It's tedious enough trying to make the borders align, but it's time-consuming doing it for each box. The end quality is worth it, I'd give myself a small pat on the shoulder for taking my time with them. It was fun picking out the titles and covers too. (Not all of them are real titles or games.) I also noticed I should have an object for the disc boxes to lean on or it would feel unreal or strange to having them standing alone.

Similarly, I had the same process with my art model. I always wanted to own an art piece called The Kiss by Gustav Klimt. While I don't have the money or space to have it on my own walls, what would stop me from having it in my own "fictional" living room? I took the time to expand the edges with the pattern tool and the patch tool in photoshop so the top, bottom, and side faces aren't empty or blank. In my opinion, it looks great.

I imported my couch and table from a previous assignment but I redid the UVs and texture so the model isn't exactly the same. I think I prefer the new textures too. Though the couch still seems a bit plastic. I'm hoping I can fix that in the attributes and some good lighting. But we'll have to see how it will turn out in the following weeks.

There is just two more weeks left until this assignment is due. Honestly, I'm excited. It's been a while since I've finished (or come close to completing) such a project. And though, I never went into this major with modeling in mind nor had much experience with it, I can see that it's pretty fun and leaves you feeling accomplished when you're close to finishing a scene. Next week's goal is to finish UV-ing and texturing, then move on to lighting and finishing touches.
Wednesday, October 16, 2019
Modeling a Living Room Part 2
CAGD230: Living Room
Week 2 Progress
Progress Report: For this week, our focus is to model the block items of our scene. Luckily most of my objects were not too difficult to model. Mainly I extruded faces and used the curve tool to create glasses and jars. I realized that 'insert edge loop' is a great tool for deleted certain faces and extruding parts of a face. The shelves were fun to model and it was quite easy to. For the one in the picture below I added two edge loops and extruded the middle face. Then I duplicated the middle face to create a glass panel. Of course, it's not visible in this screenshot because I had already added the glass texture onto the face.

The most complicated thing to model was the bamboo plant because it was more than just a cubic or spherical object. But in the end, it isn't too difficult. I just had to shift the vertices around to make a plane more "leaf-shaped". The bamboo pole part was easy too. I could easily create a cylinder and stretch it. Then I moved the edges around and shifted parts to make the bamboo more natural and less "straight".

The goal for next week is to finish UVing and adding textures to our models. And as you can see, I have started that with my bamboo model. Of course, I still have to add more touches to it so it doesn't seem "clone-y". That aside, I'm excited to texture the rest but the thought of UVing is pretty tiring.

Wednesday, October 9, 2019
Modeling a Living Room Part 1
CAGD230: Living Room
Week 1 Progress
Project Details: For this project, we need to model a living room. We had a lot of freedom for choosing what to model in this scene. And for my scene, I used a reference of a contemporary living room image found online.

For the first week, we just needed to block out the scene. Which mainly means setting up the scene and placing polygons in the areas where the object would go and just grouping the items in the outliner. So far I've simply modeled some objects so I know what they are by not just the name but the shape as well. I still have to add lights for the scene but that could be done later on. Next week, we will model more of the scene and start UV-ing.
 |
| Progress so far |
Modeling a Grocery Shelf
CAGD230: Grocery

Modeling Dinner Prep
CAGD230: Dinner Prep
Assignment Detail: In this assignment, we got an introduction to the tool Curve(s). With this, we could model the jar of our dinner prep scene. Luckily the scene is half laid out already as the wine bottle is already modeled for us and the lights and backdrop are already part of the scene. So what was left was to model the pasta box and the pasta sauce jar. Then we just needed to finish the items off by UV-ing and texturing. The pasta box was fairly easy to model. We did it with a plane and a template-box image on top. We could then fold the plane into a box and just detail it by beveling the box and fixing the image to look realistic. The pasta jar was a bit more difficult. We used the curve tool to model the jar. To model the jar and have the pasta texture inside, we needed to model the curve with two layers. An outer layer and an inside layer made up the jar. This allowed us to select faces inside the jar and duplicate them into a separate piece of the jar. We can then add the pasta texture on this piece so it will act as the pasta sauce inside the jar. The outer layer can act as a boundary and create depth for the jar. We used the glass preset on the entire body of the jar so it can be "transparent" enough to see the pasta textured object inside. We also had to UV the body and then select the label faces and create a label texture. The lid was easily modeled with the curve tool and then it was textured by a simple copper preset in the HyperShader. We UVed the wine glass the same way except the glass preset was set to a greenish color and was not "transparent" but opaque. After that, we just needed to add the labels on the body and the cork.

Modeling a Table and Couch
CAGD230: TableCouch

Assignment Details: For this assignment, we need to model a coffee table and a couch from a reference. This assignment allowed us to get used to duplicating objects and grouping them. We worked more with UVs and using the sew and stitch tool. This is also the first assignment we use actual texturing with. The texturing was done with photoshop and texture images online. A decent knowledge of photoshop tools was needed for a good texture job. We needed to make sure the image is able to be duplicated seamlessly. To do that we used the stamp tool and offset filter to make sure the image is able to mirror itself and flow into each other without it looking strange or wonky. Both the table and couch were fairly easy to model, the tricky part was texturing. While it didn't matter how the UV looked in terms of face alignment (as the texture is just repeating), it was difficult to properly UV the couch. The couch is more beveled than cubic or "sharp on the edges". This made the UV hard to unfold and straighten out. Luckily it didn't matter too much due to the texture being a pattern rather than an image or text. I'm glad to say that I feel confident in the modeling aspect of this assignment. However, the texturing and UV-ing part was more troublesome. I didn't have the time to properly texture the couch and table, thus the table's wood actually looks too big to be natural and the couch is too shiny due to the lack of work on the specular attribute in the material. The scene is also a bit dark due to the lack of light sources. However, I can learn from these flaws and do better in my next modeling assignments.
Wednesday, September 18, 2019
Modeling a Marker
CAGD230: Marker
Assignment Details: For this assignment, we needed to use more tools aside from the basic transforms. This is the first assignment where we could work with vertexes, faces, and edges. There was a introduction to image planes, the edge-loop tool, extrude tool, combine tool, and union tools. We worked with UV and more texturing. Using all these new skills, we needed to model a dry erase marker.


I actually had quite a few struggles with this one. For one, I had to remodel the marker twice before I could actually UV the marker. I messed up the first time by scaling the Z axis while in front view. It oval-ized the shape and made it difficult to properly model the cap and tip. The second mess up was when I was working with UV. The marker cap's cylinder map was not laid rectangular like the tutorial showed. It was more elongated with bumps sticking out. Even when I used 'Straighten UV' it only made it worse and fold some vertices downwards. In frustration of not knowing what the cause was, I remodeled the whole thing hoping I just made a simple mistake somewhere before I UV-ed my second attempt. However the same problem still sprang up. The cut of the cylinder map didn't start and end like the tutorial. Instead of starting the map's cut on the flat part of the cap, it started the cut in the extruded part, which causes parts to stick out. There weren't any clear answers online about my problem so I just decided to move vertices around and use "Straighten UV" to proper create a proper rectangle. Luckily the map didn't stretch out too much and the checkered template looked pretty decent in the model view. It was also lucky that the cap is just textured with a basic color, thus the my UV problem didn't cause much trouble. I can only hope such an issue doesn't arise in the future. And if it does, I hope I would know how to solve it.
Tuesday, September 17, 2019
Modeling with Primitives
CAGD230: Primitives
Assignment Details: To get used to modeling, our first assignment is to build a simple scene using the basic shapes in Maya. We could not mess with the shape's vertexes, faces, or edges. We also couldn't edit their mesh. The tools available were mainly moving, rotating, and scaling. But it is still possible to build details and complexity off basic shapes, it just takes... more shapes.


The scene I built is a city, or rather, one street of a city. The shape I used the most would definitely be a cube. It's scaled to be a rectangle or a box but there are possibly around 300-400 cubes in the scene. The buildings would be the most obvious cube-primitive structures. There's also the awnings on the bottom half of most buildings. The point of the awnings were to show more detail than just a basic door. Rather than a simple building, some of the buildings look like storefronts especially similar to buildings in Chinatown. Windows took up most of the cube-primitives. Rather than using a plane, using cubes as windows felt more natural. Planes made rather flat windows, metaphorically and literally. I actually had trouble with texturing and adding materials. It was difficult making mainly the windows shine but it turns out the buildings and the sidewalk will have to too. This was before learning how to properly UV and texturing but I am pretty disappointed that the buildings and sidewalk reflect. The most detailed object is probably the smallest. It's the water towers and there's only two. One might be more noticeable than the other. They look possibly the longest to make because I was experimenting with snaps. Although it's not noticeable, they do look rather good for being made out of basic primitives. It's the littlest things that count.
Subscribe to:
Comments (Atom)